• Skip to main content
  • Skip to footer
  • Home

The May 13 Group

the next day for evaluation

  • Get Involved
  • Our Work
  • About Us
You are here: Home / Archives for allblogs

allblogs

May 19 2022

Stop multitasking your report writing.

So I have to admit something. I am HORRIBLE at multitasking.

For example, I can’t look something up on my phone while having a conversation. I can’t cook dinner while putting together a grocery list.

“How about listen to your wife while doing anything else?” my wife added after I had asked her for examples.

But the truth is, I’m not alone in this bad at multitasking thing. Most people are really bad at multitasking.

…individuals almost always take longer to complete a task and do so with more errors when switching between tasks than when they stay with one task.”

Multicosts of Multitasking – Cerebrum

So for my report design, I just wanted it to scream, "I was created in Microsoft Word!"

So what does multitasking have to do with report writing?

If it truly was just report writing, there wouldn’t really be an issue. But modern report writing isn’t just report writing.

Creating a modern visual report requires a mix of at least three major tasks:

  • Writing
  • Illustrating
  • Designing

One of the biggest mistakes that can slow down a reporting process is trying to accomplish all three of these major tasks at the same time.

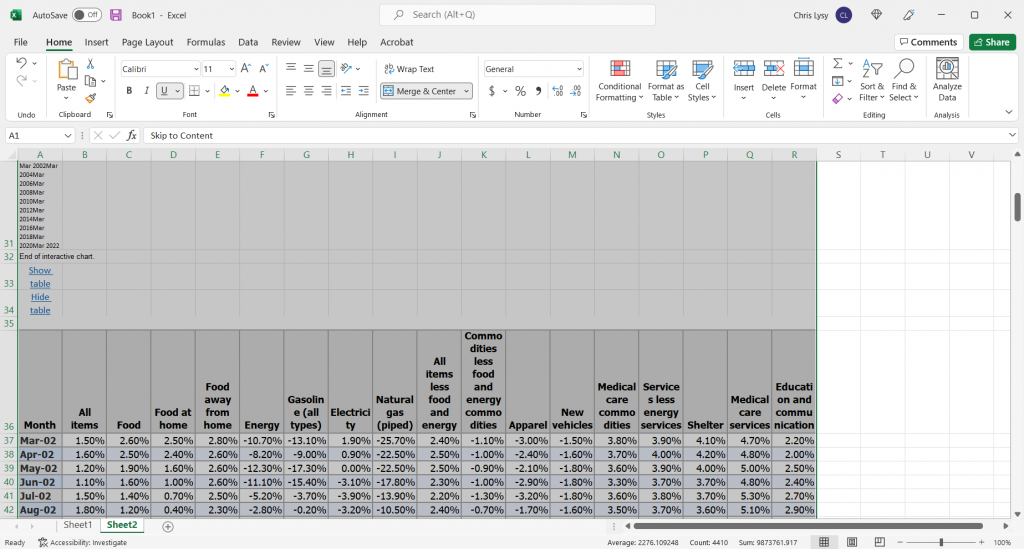
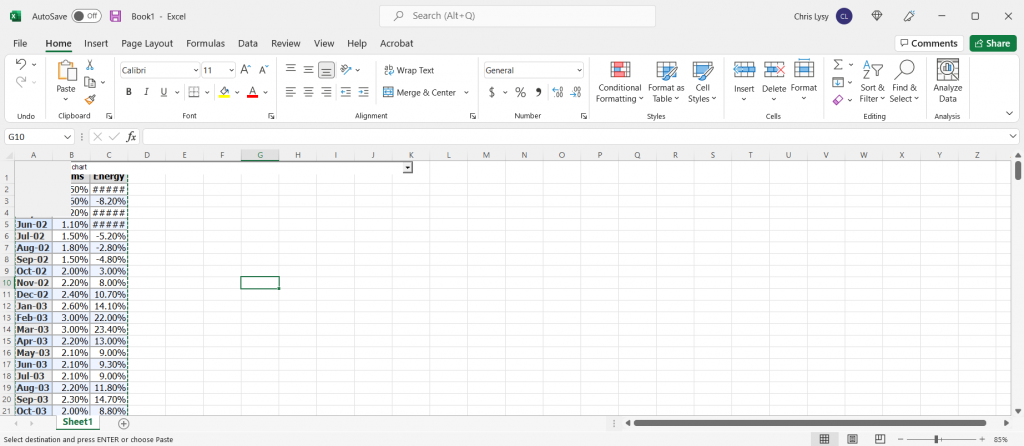
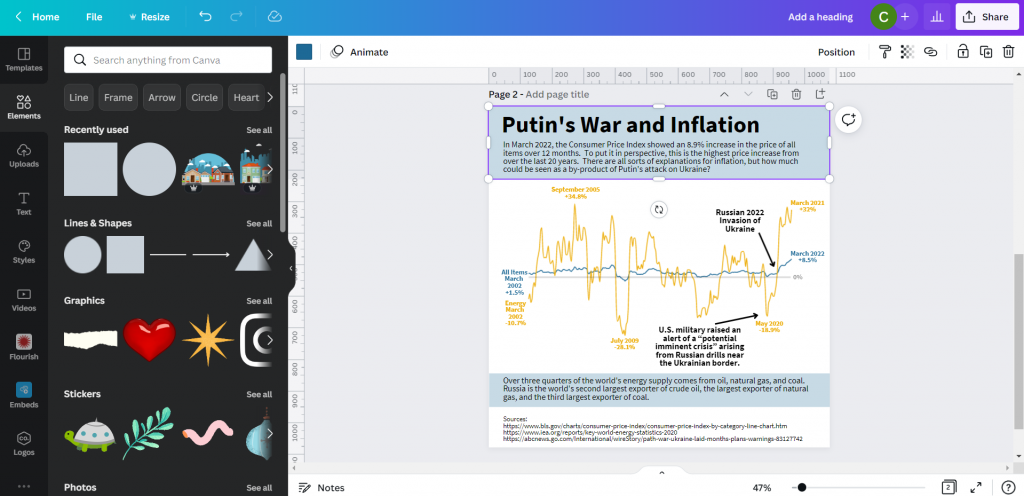
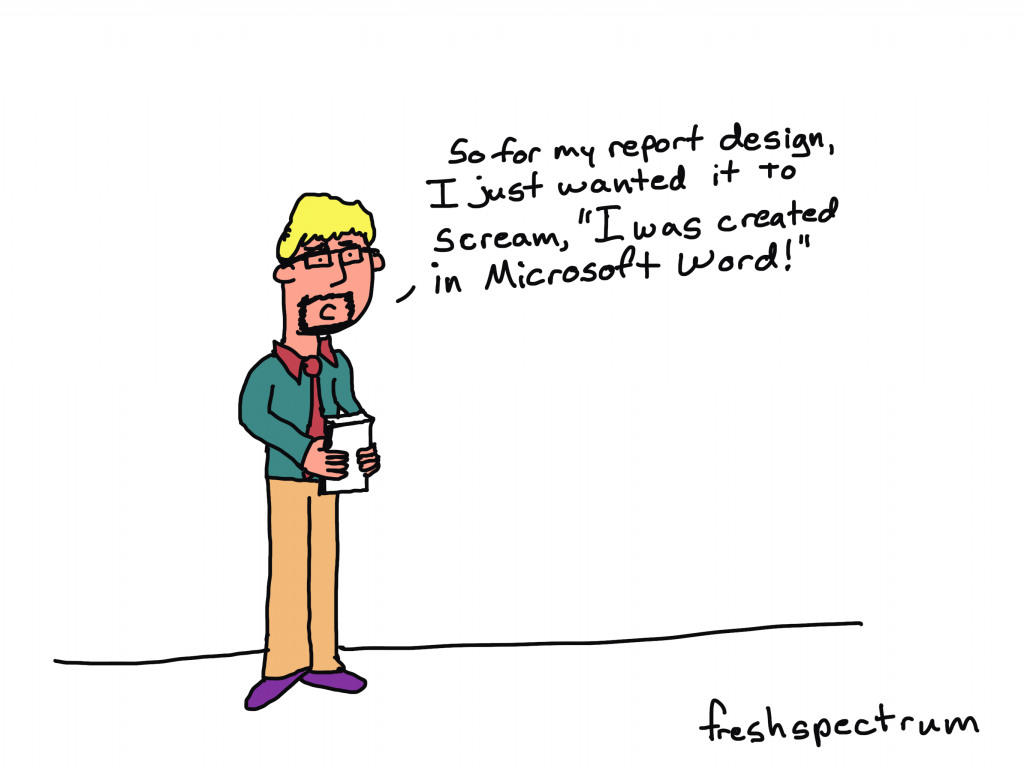
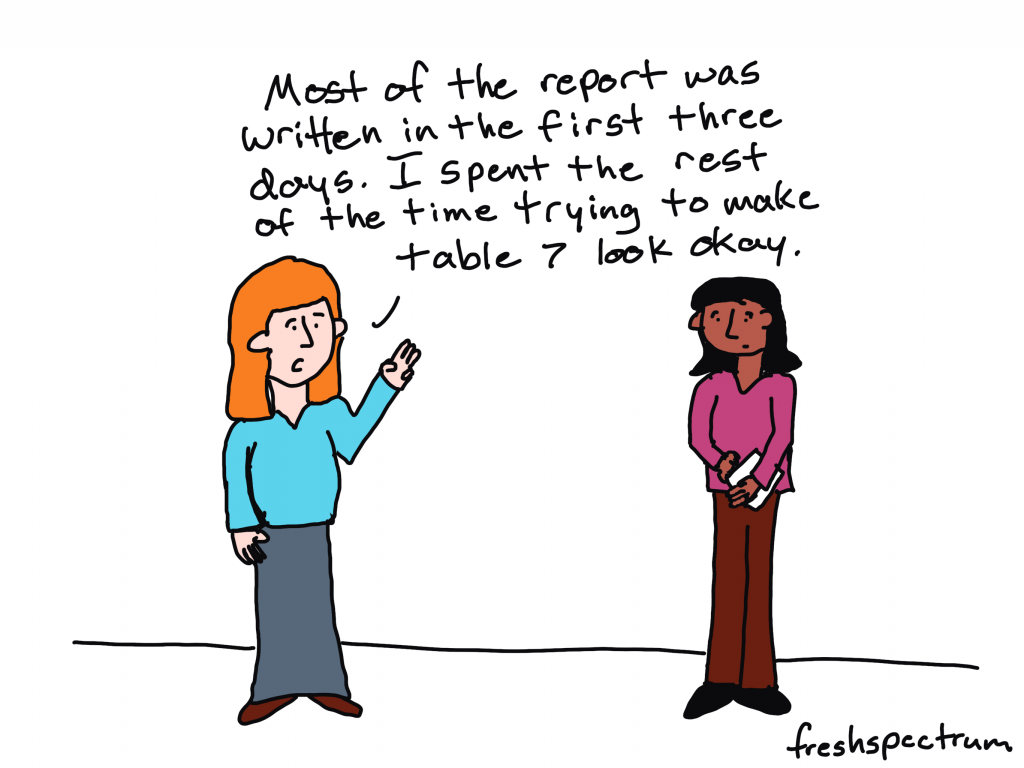
You can complain all you want about Microsoft Word, but you were the one who decided to spend 30 minutes tweaking the design of a table that will eventually need to be recreated in Adobe anyway. You were also the one who spent a bunch of time creating a chart in Excel that will need to be redesigned with new brand colors and fonts.

Cartoon showing social media messing with the passage of time.

How to single task your report writing.

The solution to the multitasking issue is to intentionally single task your reporting process. This means separating out the different report creation tasks.

Let’s talk about each one of the big three individually.

  1. The design task.
  2. The writing task.
  3. The illustration task.

1. The design task.

So I listed the design task first. This was intentional.

Lots of evaluators tend to think about design as being something you do after you finish your report. But this can be a pretty big mistake.

Here is what happens. Evaluator sits down to write report, opens up Word. Proceeds to brain dump into word document. When nearing end of draft 1, decides that nobody would likely want to read their stream of thought 200 pages.

Okay, so maybe that’s an exaggeration (I hope). But you get the point. One of the things that happens when you just write first is that you tend to over do it. You write more than you need, and sometimes WAY more than you need.

Even before you put pen to paper you know certain things that will influence the design of the report.

Such as…

  • Target page count.
  • How visual you want the report.
  • The branding guidelines for your organization.
  • The sections that need to be included.

Take all of that and design a report shell with the proper fonts and colors. You can change this later, but having it will show you how many words and pictures you’ll need. It will also give you a sense of what you can’t fit, and save you from writing things that will definitely get cut.

And if you don’t know the proper fonts, colors, and other branding guidelines, now is the time to find out.

2. The writing task.

Now that you know where you’re headed, it’s time to start writing.

This is the time to open up Word or Google Docs. Don’t worry about formatting, charts, or pictures. Just the words. Also make sure to use headings and subheadings where appropriate. And if you have something you want in a call-out box or sidebar, don’t bother creating the call-out box or sidebar. Just write something like “Sidebar:” as a header for the text.

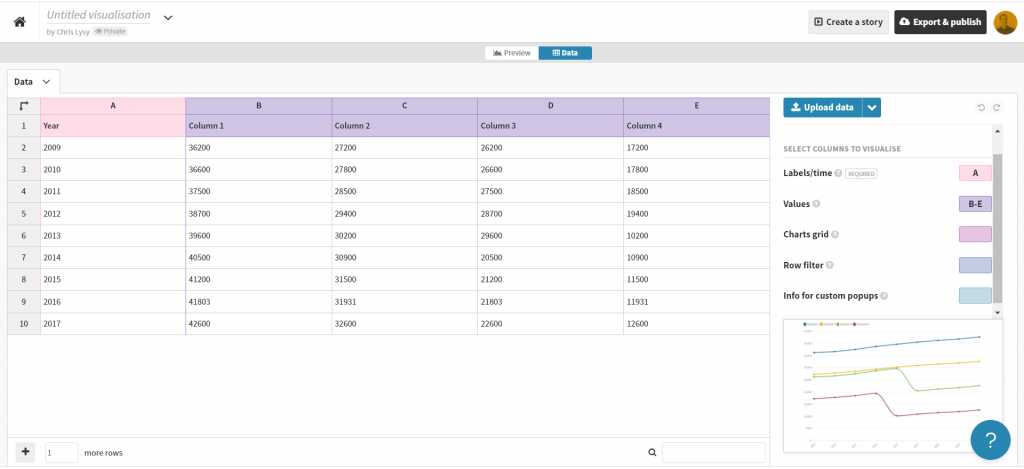
And what about data tables? I would suggest putting in the data tables, but not worrying about the formatting. As long as it is readable. Often it can be really helpful to see the numbers you are discussing during the writing process.

Eventually you are going to take the words from this document and put them into the report shell. But I suggest waiting until you’ve gone through most, if not all, of your drafts and revisions.

Most of the report was written in the first three days. I spent the rest of the time trying to make table 7 look okay.

3. The illustration task.

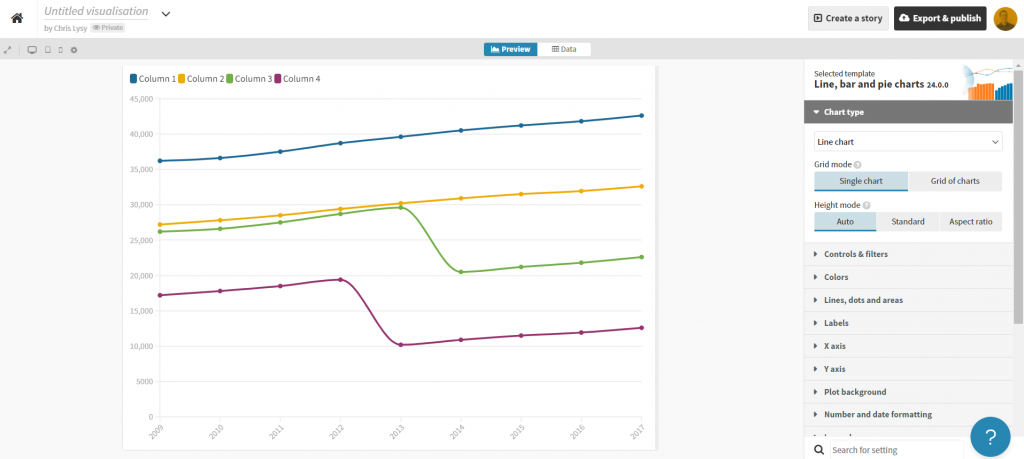
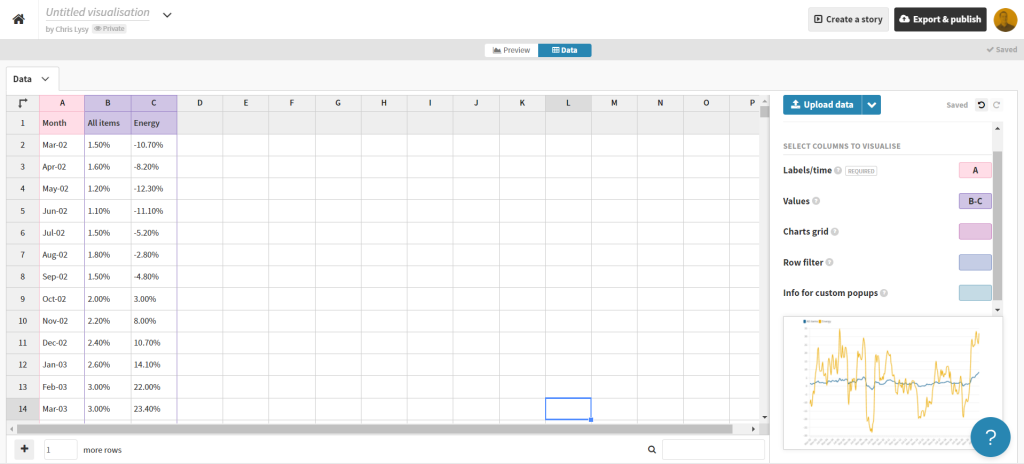
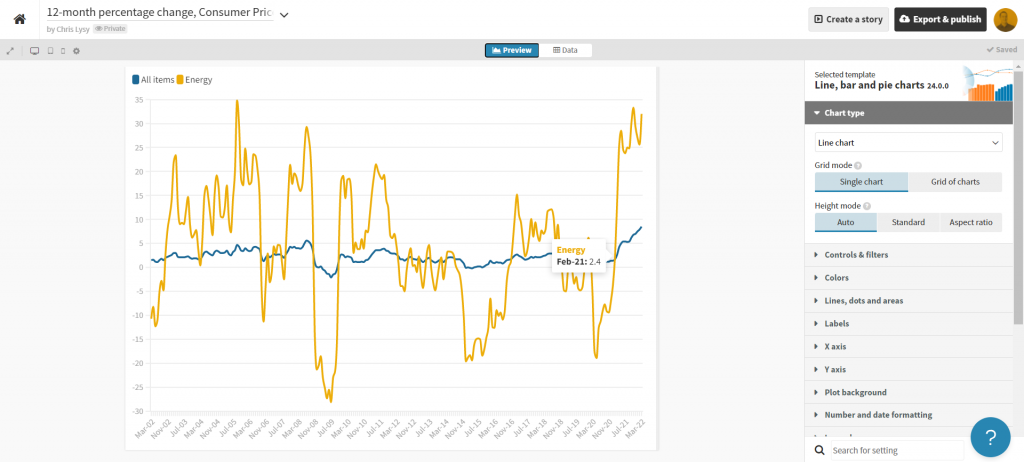
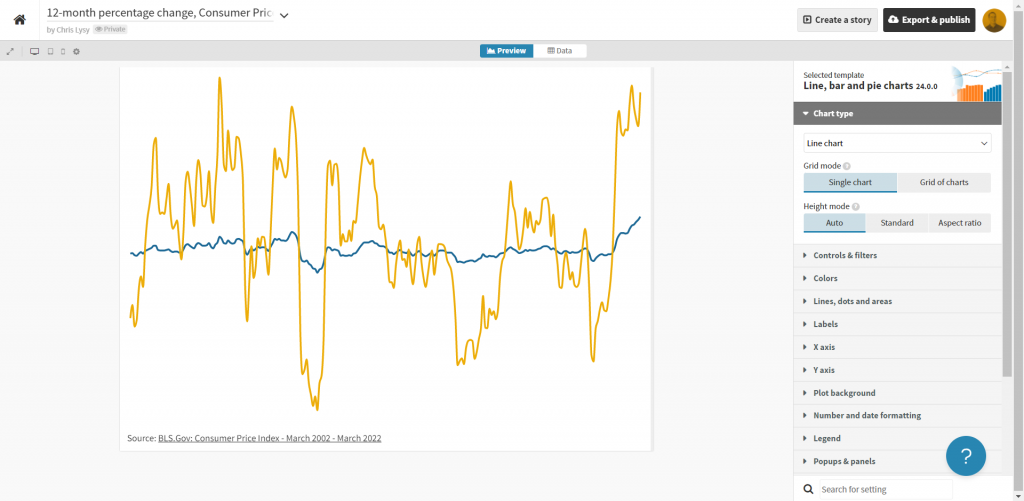
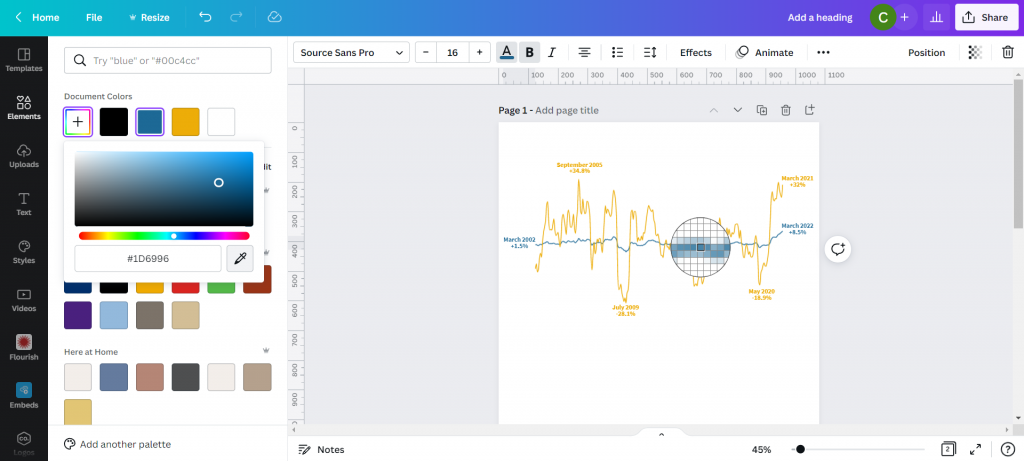
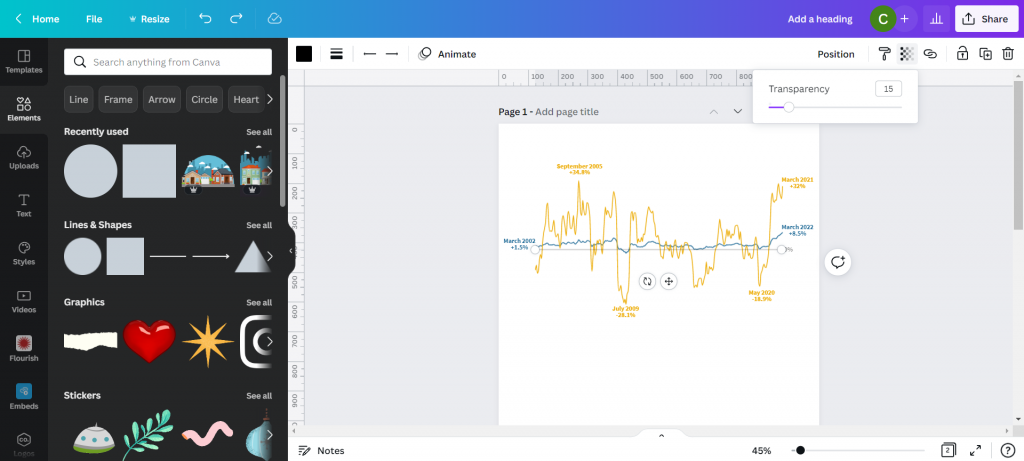
So illustration is not the same as design. During the design process you are going to put in placeholder images and charts. During the illustration process, you are going to create your images and charts.

Data visualization is an illustration task. Your goal is to make the data approachable, and you also want it to fit within the context of your report.

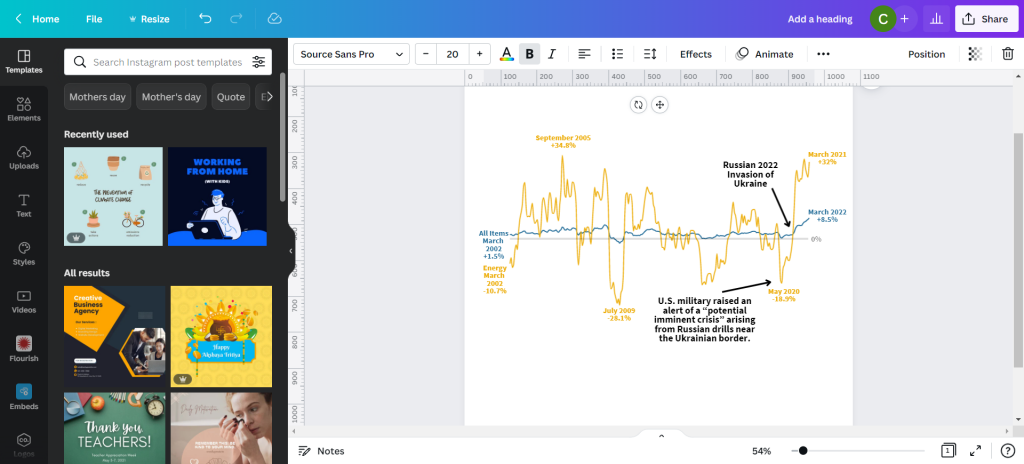
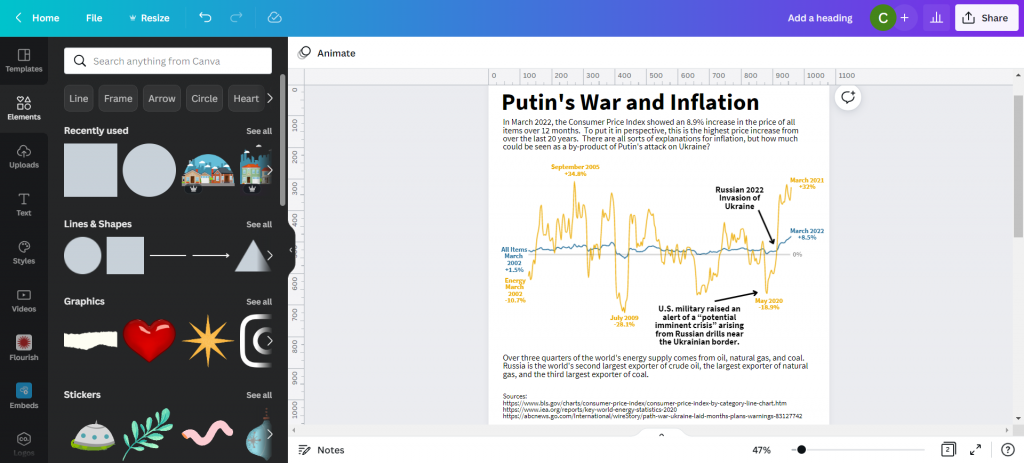
Creating explanatory figures and diagrams is an illustration task. Your goal is to create a visual explanation, and fit it within the context of your report.

Deciding on stock images is also an illustration task. The types of visuals you choose should support the words in your report.

Bouncing back and forth.

Okay, so this is almost never entirely chronological. You are likely going to have to task switch throughout your reporting process. But do it intentionally.

I usually start with design then go into writing. After writing I Illustrate. Then I go back into design mode to pull everything together. I also might need to tweak the designs where the content demands a different approach.

If you are working with a team, get feedback at all the different stages. Approve the design shell/template before putting in all the words. Try to get the writing as complete as possible before putting it all into the template (multiple revisions). Same with illustrations.

All the other tasks.

So designing, illustrating, and writing are not the only tasks required when writing a report. You’ll also likely need to incorporate tasks like proofreading, editing, sourcing, accessibility checking, etc. Just like with the other tasks, separate those parts of the process.

How do you create your reports?

  • Do you start with notecards or sticky notes?
  • Do create your design shell first, or just open up Word and start writing?
  • Do you treat illustration as a separate task or just insert images/charts as you write?
  • Do you start by building a detailed outline with bullet points and goals for each section of your report?

Let me know in the comments.

Written by cplysy · Categorized: freshspectrum

May 16 2022

Comment on Dissertation RQ3: How do researchers and evaluators differ in use, interpersonal factors, and research/evaluation factors? by Cristina

Hello Dr. Wanzer. I hope all is well. I came across your website through a YouTube video on research and evaluation on James Pann’s Channel. I am currently a graduate student at ASU and working on a class discussion project that prompted us to reach out to a professional/ author (reliable source) to discuss the research and evaluation in our current course: introduction to research and evaluation in education. The purpose of me writing to you is to gain knowledge and understanding research and evaluation and to apply it to educational enquiries. I would also like to know the tips you suggest to use when conducting research and evaluation in assignments and in an applied project/work? How would you describe the differences between research and evaluation, and the similarities between them. This might include of course the importance of each approach. We are currently focusing on the work and textbook by Mertens (2020). I would be delighted to hear from soon so I can share your thoughts with my class this week on n Sunday.

Thank you,

Cristina

Written by cplysy · Categorized: danawanzer

May 16 2022

Change Takes Time: How to Practice Patience in Report Redesign Processes

This guest post comes from Abby Henderson. Abby Henderson, MS, is a Project Manager at Veris Insights. Abby got her Master’s in Program Evaluation and Data Analytics from ASU in 2019, while working at the Center for Applied Behavioral Health Policy within the Watts College of Public Service and Community Solutions. In 2021, Abby joined the team at Veris Insights, where the focus is on bettering the world of work through providing first-class service and research on university recruiting and talent acquisition. In her free time, Abby loves to fall down internet rabbit holes about random topics, build slide decks no one ever sees, and take long walks around Phoenix with her dog. You can connect with her on LinkedIn or by sending an email to ahenderson@verisinsights.com.

We’ve all been on the receiving end of a long, boring, text-heavy report. It can be challenging to sit down and read, rarely translates insights into action, and is (for lack of a better word) boring. Well… I used to be an author of reports like that.

The Everything Report

At the start of my career, I thought the most important thing a report could convey was… well… everything. My thinking went something like this: “All of the background information, data, methods, and recommendations needed to be extensively covered.  The more technical and academic the language, the better. If I can impress people with my language and expertise, they’ll be more likely to follow the recommendations I suggest.” However, that line of thinking functions under the assumption that people will read to the end of the report to get to those recommendations.

What I came to realize early on was that people, in fact, did not want to read through a long and technical report to get to the recommendations buried at the end. On top of that, spending so much time writing extensive reports was taking time away from strategic and creative thinking about what the data means. I had so little time left for that type of thinking that my recommendations were often vague, unhelpful, or lacking in creative thinking.

Introduction to Data Visualization

Cut to a session I attended hosted by the Arizona Evaluation Network and led by Deven Wisner and Nicole Huggett on data visualization. My brain lit up with curiosity and joy at the idea that data could be conveyed simply, succinctly, and visually. That session got me started on a new journey and led to me asking new questions.

Instead of asking, “How much information can I fit in this report? How technical can I make my language?” I was now asking questions like, “What is the purpose of this report? How do I hope these findings are used? How can I communicate that clearly, succinctly, and visually?”

The next thing I knew, I was enrolled in Report Redesign through Depict Data Studio and spending much of my free time thinking about data communication. More broadly, I was (and continue to be) interested in how we bridge the gap between technical expertise and lived experience, and how we communicate across that gap regardless of building a bridge.

Starting a New Conversation

I started to have conversations with my colleagues about how we could change our reporting. I started by suggesting we add more data visualizations and fewer tables.

When I met resistance to this idea, I started to produce two versions of our reports. One version included the tables we were accustomed to, and the second version included more elements of data visualization. Through providing both options, I was able to slowly garner traction and buy-in on including data visualizations.

The next proposal I made was to include infographics, one-pagers, or shorter summaries with our reports for individuals who may only be interested in the data from a high level. Again, I took on responsibility to demonstrate what I was envisioning and how I thought it could work. This meant taking on extra workload to create the products our leadership was accustomed to, as well as products I wanted us to explore. I brought up data visualization in meetings, attended webinars, and tried to increase the data literacy on my own team.

I was hopeful but hesitant during this timeframe. After all, change takes time, and change takes even more time when you’re suddenly grappling with a pandemic and an upending of our work lives as we previously knew them to be. In this new normal, I was suddenly surrounded by data visualization. The conversation shifted in the world around us, and therefore the conversation shifted in our office as well. There was no longer a question about the utility of data visualization in reports, as we were seeing firsthand how impactful a good visualization can be to convey a message.

The conversations about change continued, as I slowly began to notice how things were shifting in our offices. Suddenly, others on my team were hoping to collaborate on infographics. I was being asked to take on more projects, but each new project was a step in the right direction. We were no longer producing reports without visualizations, and we were starting to explore including one-pagers with our annual reports as a standard across projects.

Around this time, I ended up in a new position at a new company that uses data visualization as a bedrock of our work and didn’t get to see firsthand how the process in my previous office continued to change. However, I found out from colleagues that they now include an infographic or one-pager as a standard with all annual reports, are exploring ways to add more visual elements to quarterly reports, and are continuing to increase the internal skill around data visualization.

Lessons Learned

Here are three.

Patience

The most important lesson I learned in this process was one of patience. From the moment I made my first data viz, I wanted to change everything immediately. That was neither realistic nor feasible, and looking back I wish I had aimed for a slow burn to change our processes.

Self-Reliance

By deciding this was the hill I wanted to climb, I also had to be prepared to climb alone. Sometimes this included late nights in the office making two versions of the same report. Sometimes (often) this included frustration with my own lack of knowledge about data viz best practices. I had to trust that this process was worth the extra work. However, looking back, I wish I had had better boundaries around taking on extra workload to accomplish this change. Finding other champions on my team earlier on may have helped with that as well, as data visualizations are nearly always improved by collaborative brainstorming.

Mistakes

Here’s the thing: anytime you learn something new, you’ll make mistakes. I made plenty, both in my actual visualizations and in my attempts to create internal change in my organization. The goal is not to make zero mistakes, but to use your mistakes as a jumping off point for new learnings. Accepting that mistakes are part of any change process can provide grace from the start about the challenges you’ll encounter.

Written by cplysy · Categorized: depictdatastudio

May 11 2022

Create a Line Graph Infographic with Canva and Flourish

In today’s post I’ll share the steps I used in creating a line graph centered infographic.

The more I use Flourish, the more I like Flourish. Canva is a super easy tool for infographic design, but its chart builder leaves a lot to be desired. But since there is a native connection to Flourish, there is not really a reason why I should ever need to use Canva’s chart builder.

Canva and Flourish Infographic - Putin's war and inflation.
This is the infographic I’ll walk through creating in this post.

Starting with the Data

Before we can create an infographic we need a story to tell.

Inflation is in the news with rising prices across the globe.

Here in the US we track this data through the Bureau of Labor Statistic’s Consumer Price Index. The most recent numbers that show pricing data through March of 2022 puts us at a 20 year high for prices across all items.

There is a longstanding connection between energy prices and everything else, and when you search the data you can see the correlation.

BLS chart showing CPI data.
12-month percentage change, Consumer Price Index, selected categories – Accessed, May 10, 2022

The argument I’m going to make in my infographic is that Russia’s expanded invasion of Ukraine sparked a rise in energy costs. And with the energy price’s rapid rise, all items have followed.

Total energy supply chart from IEA Key World Energy Statistics.
Key World Energy Statistics 2020 – IEA

According to data from the international energy agency most of the world’s energy comes from three sources, oil, natural gas, and coal. Globally, Russia is the second largest exporter of crude oil, the biggest exporter of natural gas, and the third largest exporter of coal.

So as the war continues, and sanctions bring increased isolation of Russia from the global economy, energy prices continue their rise.

Creating a line graph using Flourish

For this infographic I’m going to redraw the Consumer Price Index line graph shared above using Flourish.

In Flourish, we’ll use the simple Line Chart starting point.

Every time you start a new visualization in Flourish, your first step is to choose a template starting point.

Flourish chart templates.

After selecting the template, Flourish will give us a chart with dummy data.

Flourish default line graph.

Click on the “Data” tab and you’ll see how the line graph data is structured.

Flourish default line graph data structure.

Depending on how your own data is structured, you might simply need to copy/paste. Unfortunately our data needs just a little cleaning.

Preparing our data in Excel for Flourish

So our BLS chart does come with a data table. But in its current format a simple copy/paste into Flourish won’t work. Sometimes you need to try a few things to get your data into the format you need.

BLS "show table" screenshot.

With this table I found I just needed to click on the “Show Table” button. Then use CTL “A” to highlight all the data on the page. Then I just pasted everything into an Excel worksheet.

Pasted data in Excel spreadsheet screenshot.

The copy action took more than just the table, so I just have to delete some rows and extraneous info. And since I really only want to plot two lines I cut the data down to just “All items” and “Energy.”

Cleaned Excel spreadsheet CPI data.

This isn’t a perfect worksheet, but that doesn’t matter. I just wanted to get the data to this point, where I can copy it and paste it right into Flourish.

Creating the line graph in Flourish

Our job now is to paste the data into Flourish, and delete any extraneous rows.

BLS data pasted into Flourish

That’s all I had to do to have a pretty solid starting line graph in Flourish. If my goal was to create an embeddable interactive line graph I might take some more time tweaking the style. But I want to turn this chart into an infographic.

Flourish line chart of BLS CPI data

So instead of making the chart a self-contained finished product, I’m going to strip it down to the bare essentials. Then I’ll take it into Canva.

Clean Flourish chart ready to be opened in Canva.

Turning the Flourish line graph into an infographic using Canva

First thing is to choose the style of infographic I want to create in Canva. I decided just to create a square, so I used a blank Instagram post.

Yes, there is an infographic category in Canva, but I don’t really like the long image format.

Canva instagram post templates

Once I’m in the Canva design app, I’ll venture down to the “More” menu button on the bottom left of the page and find the “Flourish” app.

Canva Flourish App

This let’s me import in visuals I created in Flourish.

Canva with Flourish line graph.

This isn’t simply an image right now, but an embedded interactive graph. I can adjust the size without distorting the visual right within Canva. I can also double click the box to interact with the visual, which lets me see individual data points.

Canva with Flourish line graph.

With my infographic style chart I’m not worried about showing the numbers for all the data. I just want to make sure I label the high point, low point, beginning, end, and any other spot that would be instrumental in telling my story.

I just the eyedropper in document colors to adjust the labels color to match each specific line (All items or Energy).

Canva showing eyedropper color finding tool.

I also went ahead and dropped in a gray heavily transparent line to show where 0% would be in my line graph. I’m not worried about going any deeper because I’ll also share a link to the underlying data source.

Canva line graph labeled.

My next step will be to add annotations to tell the story. You’ll notice that I’m not really being super direct, more inferring the relationship. There is certainly a relationship between the war in Ukraine and the rise in inflation, and while it’s definitely not the only plausible explanation, there is enough of a connection to make for an interesting infographic.

Canva line graph labeled and annotated.

My next step is to just tell a little bit of the story and what we are looking at in the chart. Just because an infographic is a visual thing doesn’t mean we have to rely solely on the graph.

Canva infographic with narrative text.

Not sure if this is an improvement or not, but I ended a few square color blocks to create a little more separation. I think it makes the chart look a little like a widescreen movie and helps to draw your eyes.

Canva infographic with narrative text.

And here is my final infographic.

Canva and Flourish Infographic Line Graph on Putin's War and Inflation.

Written by cplysy · Categorized: freshspectrum

May 10 2022

Practical Systems Thinking: The Cynefin Framework

The Cynefin Framework is among the most widely used frameworks for understanding how systems are organized. It might be the most practical means of bringing systems thinking to life. A system, after all, is simply an organization of things within some constraint or boundary.

We rely on The Cynefin Framework (pronounced /kəˈnɛvɪn/ kuh-NEV-in) as a central platform in our training and consulting work for strategy, evaluation, and design. The reasons are many, but its utility is the most important of them.

What makes the Framework so useful is that people can relate to the stories we tell about systems using it. Perhaps the best story comes from the Framework’s founder and chief advocate, Dave Snowden in describing how to organize a children’s party using systems thinking*.

This video has been our most widely-referred source for teaching the fundamentals of systems thinking since it was first made.

The Framework has also been an inspiration informing the development of a centre for studying and intervening in complex systems based in Wales. It’s also developed into a burgeoning practice and learning community centred around the model.

The video below adds detail to help explain how the Cynefin Framework functions and where it came from.

We recommend reading Chris Corrigan’s excellent update on the Cynefin Framework. Chris has been one of the leading practitioners contributing to the thinking on the Framework’s use and development.

Using the Framework

Unlike many other Frameworks, Cynefin is useful throughout a project life cycle, not just at a particular stage.

In the beginning, we recommend using it to orient yourself to the situation you’re facing. What kind of problem situation do you find yourself in? What elements of the situation are complicated, complex, or simple? These questions aided by the Framework can help you identify key aspects of the system and complement systems mapping work.

As you move through the project, the Framework can help serve as a wayfinding tool. When you know where you are, it is easier to see where you are going. Social systems are dynamic, so while we may find ourselves in a quadrant at one stage, this can shift during the project or at particular moments.

The Framework can also be used as an evaluation tool by helping frame the questions you ask and the strategies that link your actions to your outcomes. By inquiring about the way your work and activities are organized within systems, we can ask better questions and assess real influence and possible impact.

We recommend starting any evaluation with the Cynefin Framework.

We also recommend using the framework as part of a strategic assessment approach to planning and sensemaking. The framework can help you to determine the role of evidence and practice — when to look for ‘best evidence‘, practice-based evidence, and innovative problem-solving options.

Moving Forward with Cynefin

We recommend using Cynefin Framework to anyone working in applied systems thinking, check it out. There is a global community of scholars, practitioners, and policy-makers who are working on advancing, testing, and documenting the use of it in practice. A recent book has been published that provides further examples and can be of use to anyone looking to get into Cynefin.

It’s worth the effort to explore – and we think you’ll agree.

* It is worth noting that our use of the term systems thinking is just that: thinking about systems and how they are organized and function. We recognize there are many different definitions and models of systems thinking including those used by Dave Snowden that may not fully subscribe to ours.

If you want help in applying lessons from the Cynefin Framework or building up your systems thinking capacity for action and strategy, reach out and let’s have a coffee meeting. We can help.

Image credit: Mitchell Luo on Unsplash; Snowded, CC BY-SA 3.0 https://creativecommons.org/licenses/by-sa/3.0, via Wikimedia Commons

The post Practical Systems Thinking: The Cynefin Framework appeared first on Cense Ltd. .

Written by cplysy · Categorized: cameronnorman

  • « Go to Previous Page
  • Go to page 1
  • Interim pages omitted …
  • Go to page 128
  • Go to page 129
  • Go to page 130
  • Go to page 131
  • Go to page 132
  • Interim pages omitted …
  • Go to page 310
  • Go to Next Page »

Footer

Follow our Work

The easiest way to stay connected to our work is to join our newsletter. You’ll get updates on projects, learn about new events, and hear stories from those evaluators whom the field continues to actively exclude and erase.

Get Updates

Want to take further action or join a pod? Click here to learn more.

Copyright © 2026 · The May 13 Group · Log in

en English
af Afrikaanssq Shqipam አማርኛar العربيةhy Հայերենaz Azərbaycan dilieu Euskarabe Беларуская моваbn বাংলাbs Bosanskibg Българскиca Catalàceb Cebuanony Chichewazh-CN 简体中文zh-TW 繁體中文co Corsuhr Hrvatskics Čeština‎da Dansknl Nederlandsen Englisheo Esperantoet Eestitl Filipinofi Suomifr Françaisfy Fryskgl Galegoka ქართულიde Deutschel Ελληνικάgu ગુજરાતીht Kreyol ayisyenha Harshen Hausahaw Ōlelo Hawaiʻiiw עִבְרִיתhi हिन्दीhmn Hmonghu Magyaris Íslenskaig Igboid Bahasa Indonesiaga Gaeilgeit Italianoja 日本語jw Basa Jawakn ಕನ್ನಡkk Қазақ тіліkm ភាសាខ្មែរko 한국어ku كوردی‎ky Кыргызчаlo ພາສາລາວla Latinlv Latviešu valodalt Lietuvių kalbalb Lëtzebuergeschmk Македонски јазикmg Malagasyms Bahasa Melayuml മലയാളംmt Maltesemi Te Reo Māorimr मराठीmn Монголmy ဗမာစာne नेपालीno Norsk bokmålps پښتوfa فارسیpl Polskipt Portuguêspa ਪੰਜਾਬੀro Românăru Русскийsm Samoangd Gàidhligsr Српски језикst Sesothosn Shonasd سنڌيsi සිංහලsk Slovenčinasl Slovenščinaso Afsoomaalies Españolsu Basa Sundasw Kiswahilisv Svenskatg Тоҷикӣta தமிழ்te తెలుగుth ไทยtr Türkçeuk Українськаur اردوuz O‘zbekchavi Tiếng Việtcy Cymraegxh isiXhosayi יידישyo Yorùbázu Zulu